An instruction manual design to help Syrian refugees keep warm during winter – designed for CARE International
We offered our information design services to CARE when the TDL team participated in the ‘Construction Challenge’ in the summer of 2013, as we could see the value in clear information design to help people in terrible situations around the world. This post explains how we designed an instruction manual to provide advice on keeping warm during Winter.
CARE took us up on the offer and asked for our help during the crisis in Syria, where millions of people were fleeing the country to find homes in Jordan, Lebanon and Turkey. We designed a leaflet to help the refugees prepare for winter, by providing them information on how to ‘winterise’ their shelter.
We only had five days to design the initial concept for field testing, so documented the design process live, and sought feedback during the week. Detailed below are our notes during the five days.
Kickoff
We were briefed by a member of the CARE team following a couple of emails. He explained the need for a clear, easy to understand document, and highlighted a number of design constraints. The instruction manual must:
- be two sided paper leaflet;
- be handed out with ‘non food items’, i.e. equipment to help winterise your accommodation;
- lend itself to being discussed in groups leading the initiative;
- explain the priorities of keeping warm as stated by ‘Global Shelter Cluster‘ best practice;
- give details of winterisation methods; and
- highlight benefits of winterisation over ‘buying another heater’
This is a challenging project for a number of reasons:
- it must help people prepare for the winter;
- language and legibility issues;
- restrictive printing methods/materials;
- potential cultural implications; and
- tight timeframe and no budget!

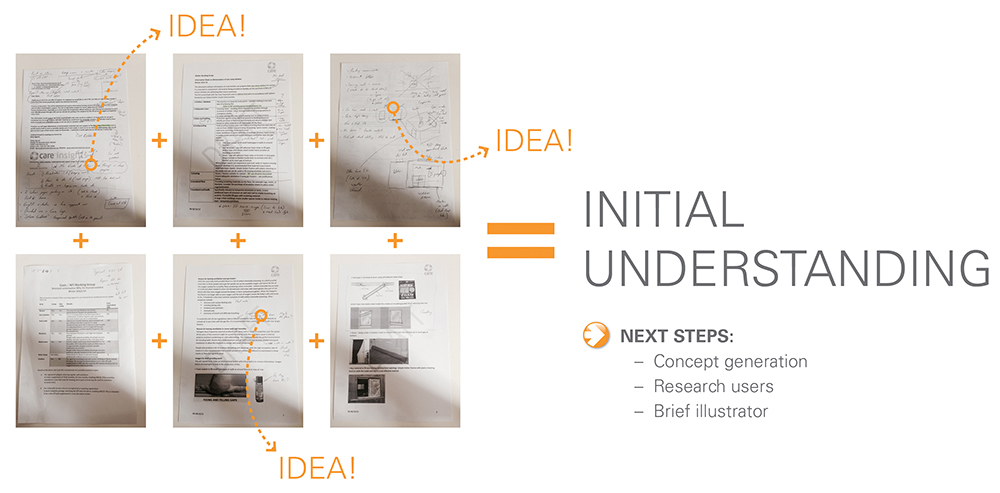
Day One (Monday)
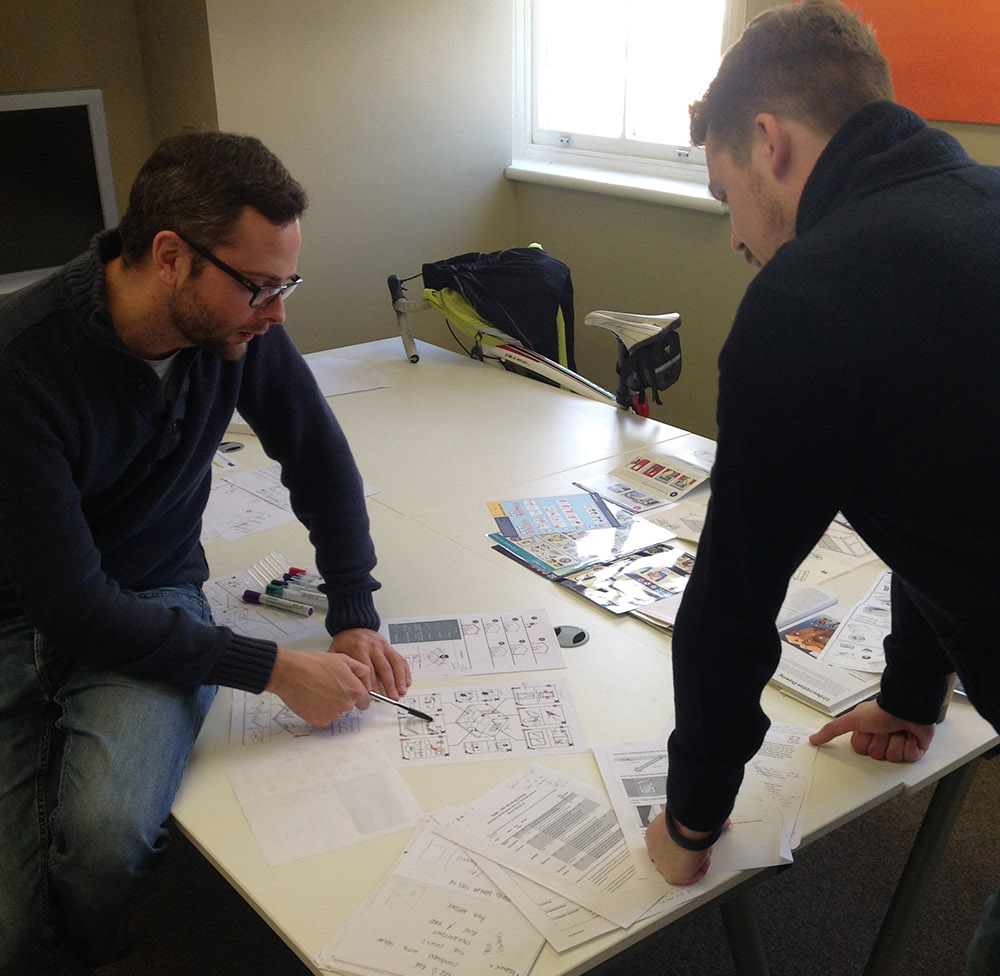
A bit more research and ideas generation today, with initial thoughts on the wall around constraints/challenges, what elements are required (structure of the document), and potential graphic representation techniques/icons.
Understanding the constraints and challenges early on is the key to user-centric design. All ideas get recorded and we start to see paths to pursue.
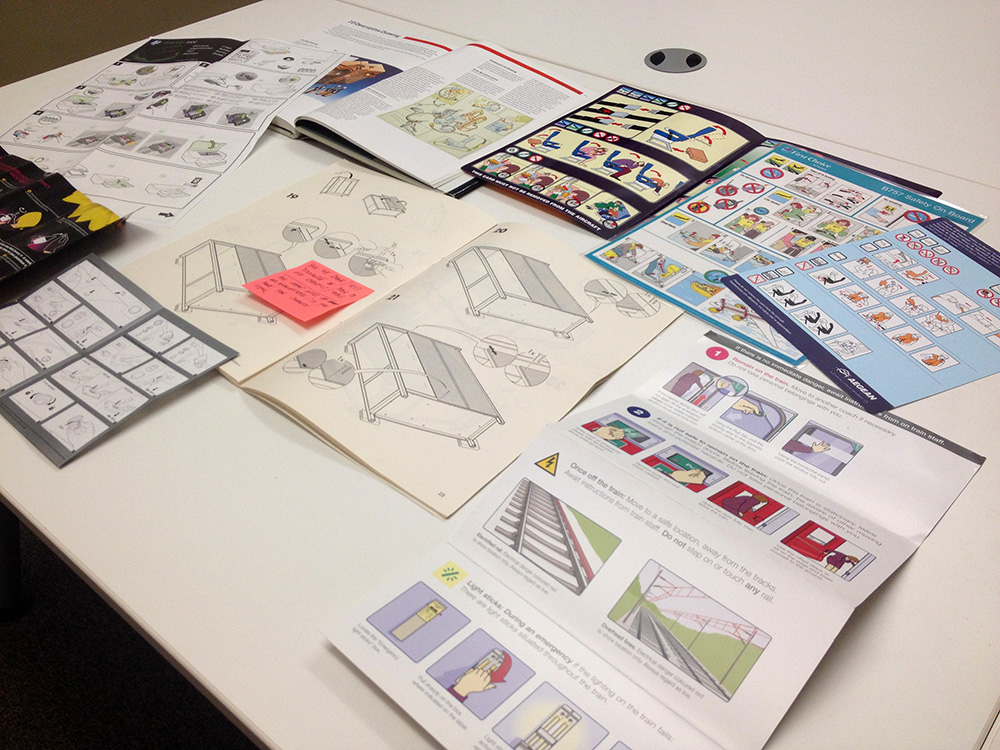
We could see a need to symbolise certain elements and actions to minimise the use of text. A quick web trawl and an email sent for user feedback while we start designing tomorrow; numbering the options will help the client communicate back to us. NOTE: we have not produced the images below, and do not own the copyright.
As the final product is going to educate the user and promote activity, we want to make sure this is easy to understand. It’s going to be quite a challenge to portray the requirement to prevent heat loss, but still retain good ventilation to reduce carbon monoxide build up. So a bit more research…!
![]()
![]()
Day Two (Tuesday)
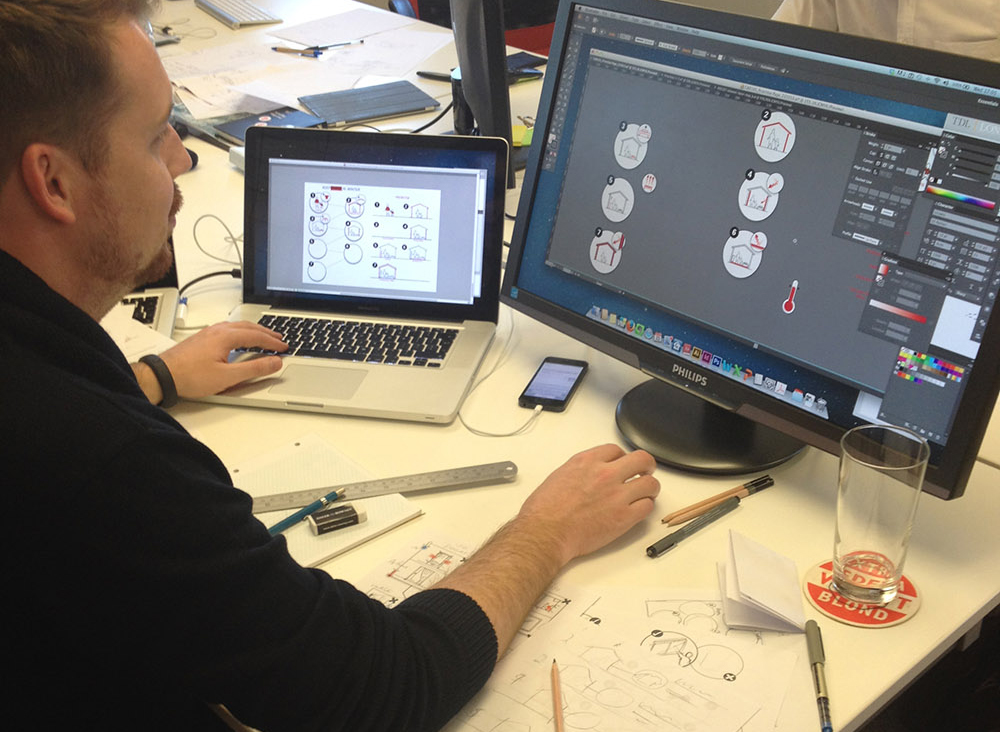
Illustration and layout today. Kim Hargreaves worked up some illustrations to represent priorities for keeping warm, and actions for winterising your house. The brief was simplistic line art, no faces and clear messaging.
While Kim was busy illustrating, Dave was working on the layout, vectorising illustrations as they were finished and popping them into the design. Dave has worked up a double-sided A4 portrait, and also a booklet A4 folded down to A5 (we checked A4 paper is used on site). The booklet naturally splits the page and might be a useful concept to progress – but folding would add to the cost.
Next steps will be to refine the design of both layout options, and make sure the illustrations are portraying the right messages. Still lots to do!
The A5 booklet is a nice split (especially the before and after element to the room) but will add to the cost, and can’t really double up as a poster. We will need to work on the Carbon Monoxide feature, but I like the idea of using an actual lifesize cutout to indicate how much ventilation is required.
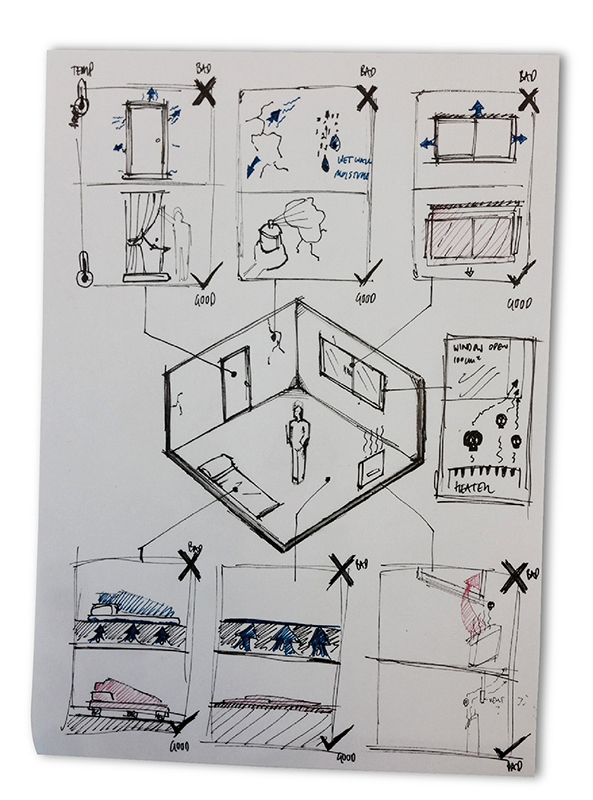
Day Three (Wednesday)
A day of changing directions! We spent the morning going over the drafts Dave worked up yesterday and have made some changes to the layout:
- A4 portrait suits the priorities section better (to flow top to bottom)
- Not using the booklet any more so it can work as a poster
- Circles for ‘zoom in’ elements to define the good and bad more clearly
- Illustrated people ‘doing’ the actions, rather than showing the final outcome
So a big push tomorrow so we can get a draft out to CARE with an aim to make changes on Friday.
Discussion on the placement of icons and the illustration, as well as turning squares into circles – sometimes you have to go in one direction to realise it’s not quite right, but you wouldn’t have known unless you tried. Circles are rarely the most efficient shape when it comes to space, but put together they define separate elements more clearly – perfect for the ‘good’ and ‘bad’ illustrations. A number of the decisions were made by printing out at actual size, rather than just reviewing on screen.

DAY Four & Five (Thursday & Friday)
We might as well bulk these two days together as Thursday was a long day! This was the last day of tweaking the designs before sending the draft the CARE.
Here is a summary of the edits:
- Kim came back to refine the illustrations, as we wanted to promote actions in the ‘good’ boxes
- A mix of isometric and elevation views depending on content requirements
- Re-work of the ventilation section (making it stand out)
- Giving a texture to all heat elements
- Consistent use of colour
- Line weight differences to define objects
- Arrow styles to represent heat loss and action
- Small amount of user testing (in the office)
- Branding (optional)
So now it’s going to CARE for testing in the ‘field’, and we will await feedback. It’s taken 42.5 hours (Dave’s artworking, Kim’s illustration and Oliver’s strategy/blogging) to get to this stage, but we are really happy with the output.
The illustrations give subtle indications on action and, in the case of beds, feeling i.e. cold. But it’s also giving strong messages about key issues like ventilation – the skull might be a bit too much but we shall see what people think from the feedback. Note the line thickness differentiation; a technique used in technical drawing.

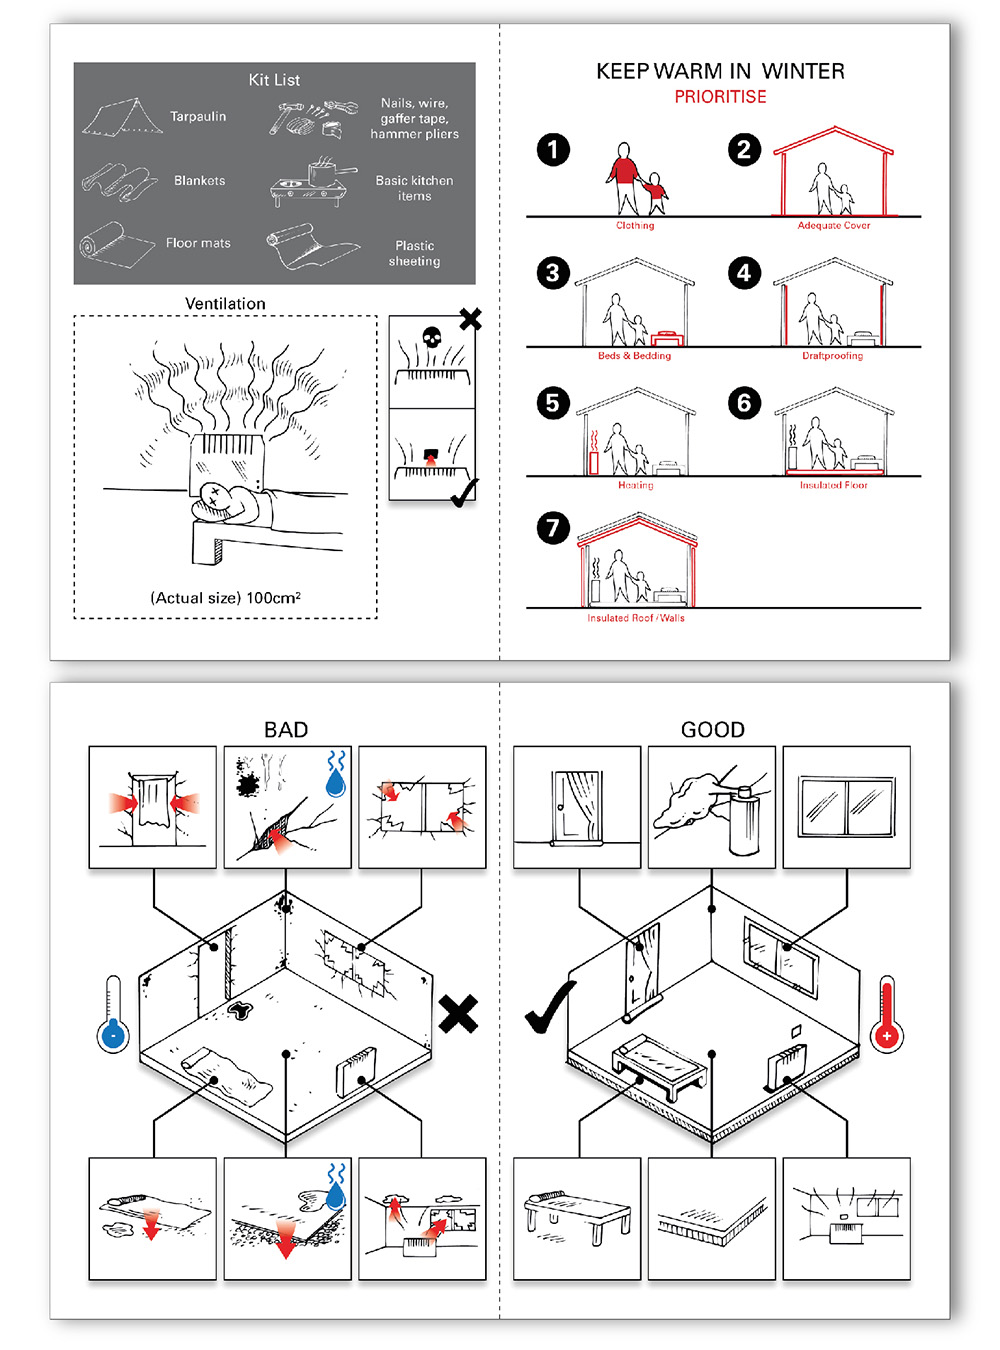
FINAL PRODUCT
Following user testing, feedback and additional content, we were able to finish off the design and work on an Arabic version too. Working up the translated version was quite challenging, requiring flipped designs (for reading right to left) and a specialist Arabic typeface; it also meant the text wouldn’t flow around the circles as in the English version.
We are really proud of this project, and it’s been fantastic to work on something we know can make a difference to people’s lives in some terrible conditions.
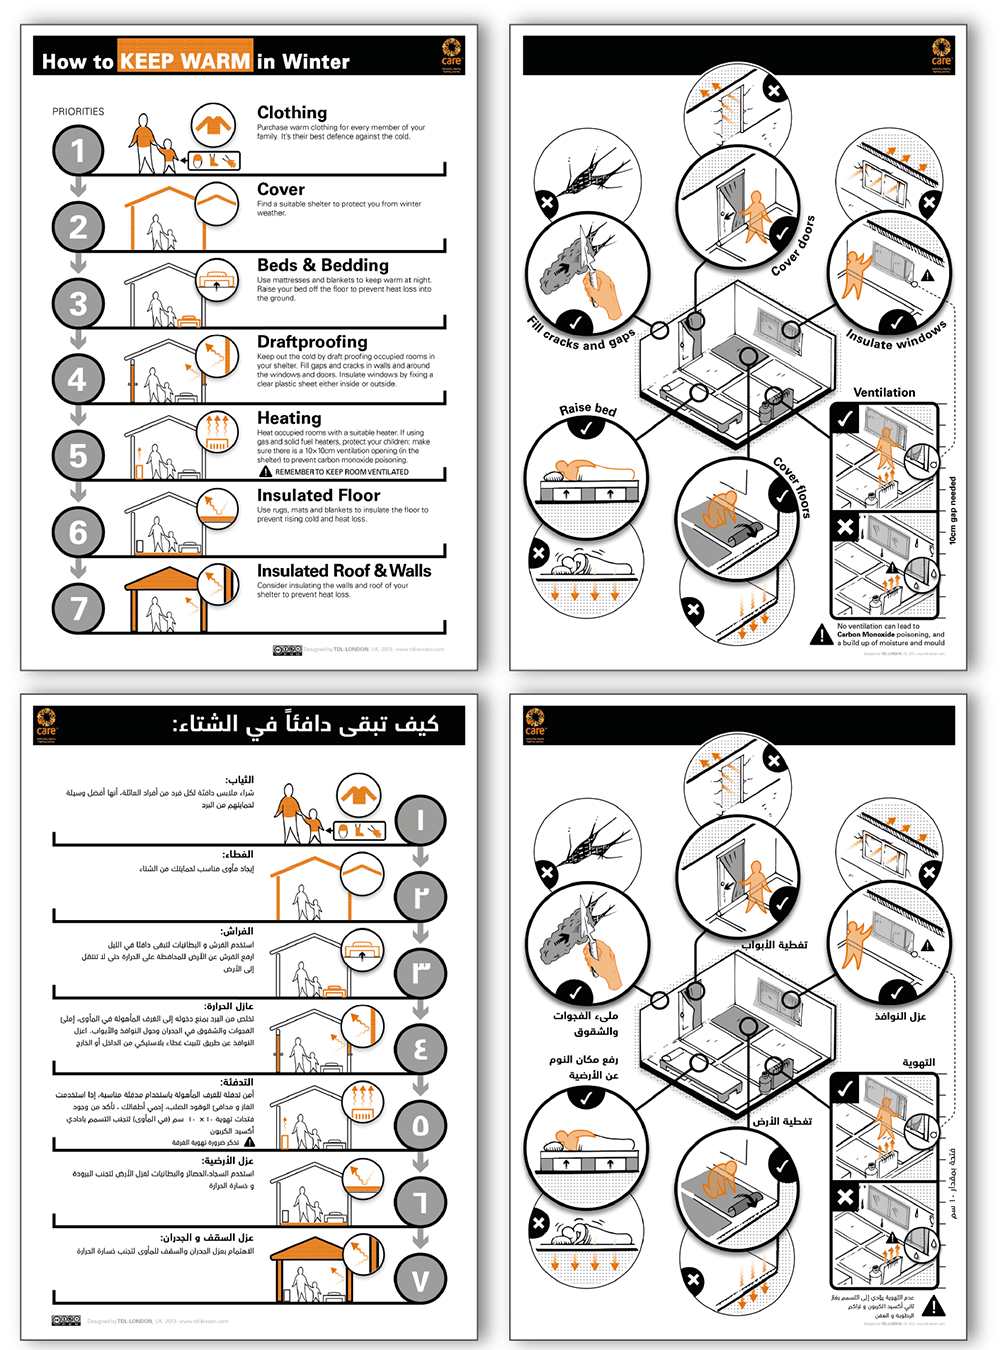
Descriptive text added to the steps, with arrows to define the reading flow. Comparison of English and Arabic layouts, with Arabic version reading right to left. Note the smaller type size required to fit the translation.
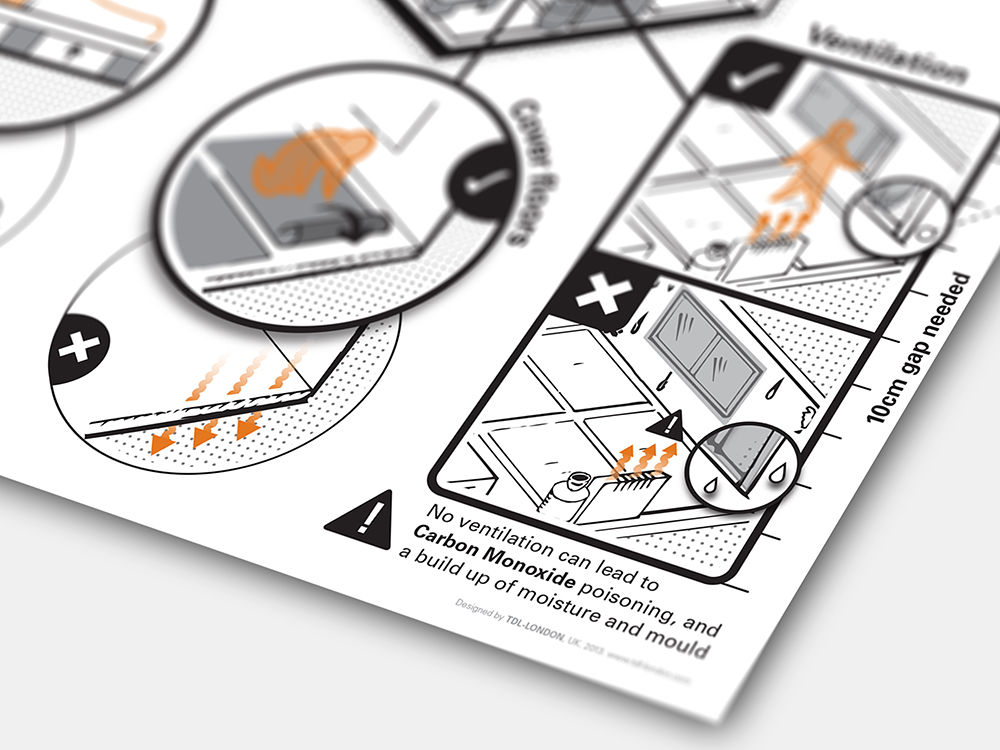
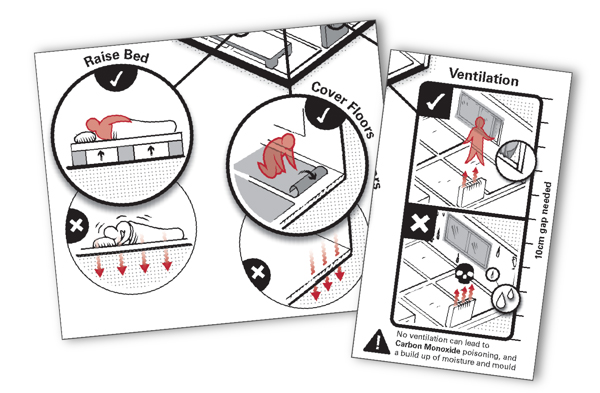
Only a few changes to the rear of the document, the ‘how to’ section, highlighting good and bad procedures. The most difficult bit was explaining Carbon Monoxide; on one hand we are saying close gaps and holes, but then we say you still need to leave an opening for the gases to escape. The scale on the side was to give the reader an idea of the gap size.

Great to see our work being used!
If you enjoyed reading this blog post then you may enjoy our newsletter; TDL Quarterly! We will send you information on our team, latest projects and exciting initiatives every 3 months. You can sign up by clicking this link.